We believe we have an online store closer to you. Would you instead like to visit: Canada International Australia Ireland Sweden UK USA

Rollator LED Front Light 1000 Lumen Rechargeable

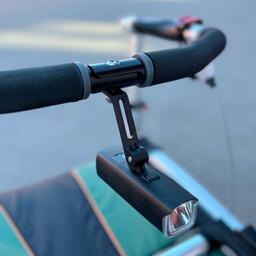
LED Front Light – Compact, Powerful, and Safe

SKU: 11-90-034
Stock Status: In Stock
Delivery Status: 3-5 working days
690 kr
Including Tax: 138 kr (25%)
pcs

Rollator LED Front Light 1000 Lumen with Rechargeable Battery

Purpose:         To see
Light power:   1000 Lumen

Upgrade your rollator with the Rollator Front Light 1000 Lumen, a compact yet powerful lighting solution designed specifically for those on the move in the evening and winter dark. With a maximum output of 1000 Lumen, this LED front light ensures exceptional visibility, perfect for early morning or nighttime use, enhancing both safety and convenience. Engineered with an anti-glare design and a wide-viewing angle, the LW-F1000 provides optimal lighting for you without blinding others, making it ideal for you and the safety of pedestrians and cyclists around you.

The light is built to endure even the harshest conditions. Rated IPX6 for water resistance, it’s perfect for withstanding heavy rain and rough weather, keeping you safe and secure during any outdoor journey. The high-quality aluminium alloy construction ensures durability while maintaining a sleek and lightweight design, finished in a stylish matte black with hard anodizing for extra protection.

Equipped with a Type-C USB charging port and a 4000mAh 21700 Li-ion battery, the LW-F1000 charges fully in just 5 hours and operates for extended periods. With multiple modes—ranging from 100% steady at 600 lumens (3.5 hours + 1 hour safe mode) to SOS and slow flash modes (14 hours)—you can tailor the brightness to your needs. For maximum power, a double-click activates the Ultra Bright Mode, delivering 1000 lumens for 2.5 hours, perfect for low-light environments. The mode memory function saves your last setting, making operation simple and efficient.

Additionally, the Rollator Front Light doubles as a power bank with a USB-A output, allowing you to charge your devices on the go, a great feature for users needing extra power for phones or other electronics.

Smart Safety Features:

  • Safe Mode: When the battery runs low, the light automatically switches to a 50-lumen safe mode, providing an additional 30 minutes of illumination to ensure you reach your destination safely.
  • StVZO standard lens: Certified for anti-glare and precise beam direction, meeting the highest safety standards.

Max light power: 1000 Lumen
Color Temperature: 5000K
Battery Capacity: 4000mAh
Modes & Runtime: 5 modes, including Ultra Bright (1000 Lumen), steady (600-150 Lumen), and flashing options
Charge Time: 5 hours
Size: 113mm (L) x 33mm (W) x 33mm (H)
Weight (w/ bracket): 220.5g
Waterproof Rating: IP65

User Guides

The documentation for this product includes the manuals and instructions listed below. You can choose to view the documentation online or download it for local use.

1000 Lumen Trionic LED Front Light

This manual both shows how you attach the light holder and the light on a Walker (left column below) and also how you attach them on a Veloped (right column below).

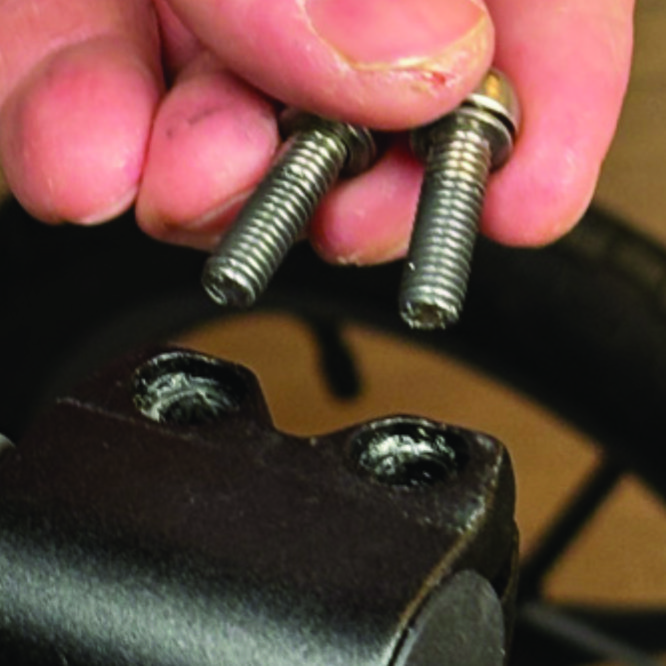
In the left-hand photo, A shows the holder attachment parts for a Walker (2 screws + 2 washers). B shows the holder attachment parts for a Veloped (1 screw + 1 knurled nut + 1 nut).

1000 Lumen Trionic LED Front Light

Attaching the Light Holder

Instructions for a Walker

On top of the black semi-vertical tube, locate the two screws that clamp the grip tube, situated in front of the brake lever.
A1. On top of the black semi-vertical tube, locate the two screws that clamp the grip tube, situated in front of the brake lever.
Loosen both screws with the 5mm allen key included with the LED light.
A2. Loosen both screws with the 5mm allen key included with the LED light.
Remove the two screws from the grip clamp.
A3. Remove the two screws from the grip clamp.
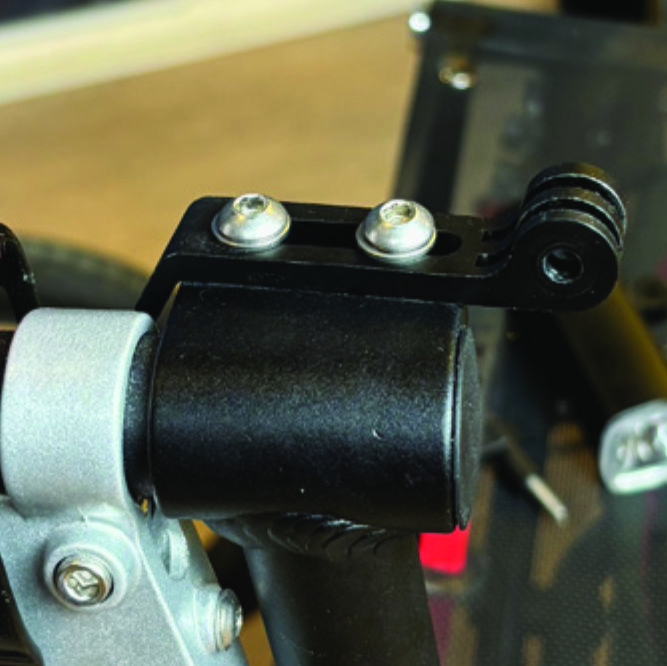
Place the light holder on top of the grip clamp, with its circular and slotted light attachment pointing forwards and upwards. Enter the two screws with washers into the holes of the clamp.
A4. Place the light holder on top of the grip clamp, with its circular and slotted light attachment pointing forwards and upwards. Enter the two screws with washers into the holes of the clamp.
Tighten the two screws with the 5mm allen key. NOTE: It is important that you tighten the screws properly as they secure the grip tube with its rubber grip and brake lever.
A5. Tighten the two screws with the 5mm allen key. NOTE: It is important that you tighten the screws properly as they secure the grip tube with its rubber grip and brake lever.

Instructions for a Veloped

Locate the screw at the center folding hinge of the U-shaped grip bar of the Veloped. Unscrew the screw with the included 4mm allen key and remove it.
A1. Locate the screw at the center folding hinge of the U-shaped grip bar of the Veloped. Unscrew the screw with the included 4mm allen key and remove it.
Replace the old screw with the longer screw included with the LED light. Attach the longer screw to the hinge and tighten it with the 4mm allen key.
B2. Replace the old screw with the longer screw included with the LED light. Attach the longer screw to the hinge and tighten it with the 4mm allen key.
Attach the short angled end of the light holder to the lower end of the screw, on the downside of the U-shaped grip bar. The holder should point downwards. Fasten the holder with one washer and the knurled nut that you tighten with your fingers.
B3. Attach the short angled end of the light holder to the lower end of the screw, on the downside of the U-shaped grip bar. The holder should point downwards. Fasten the holder with one washer and the knurled nut that you tighten with your fingers.
For a more secure holder attachment, avoiding the holder to unintentionally turn sideways, replace the knurled nut with the included stainless steel nut and tighten it with a 10mm spanner.
B4. For a more secure holder attachment, avoiding the holder to unintentionally turn sideways, replace the knurled nut with the included stainless steel nut and tighten it with a 10mm spanner.
This photo shows the light holder as correctly attached.
B5. This photo shows the light holder as correctly attached.

Attaching the LED Light to the Holder

Instructions for a Walker

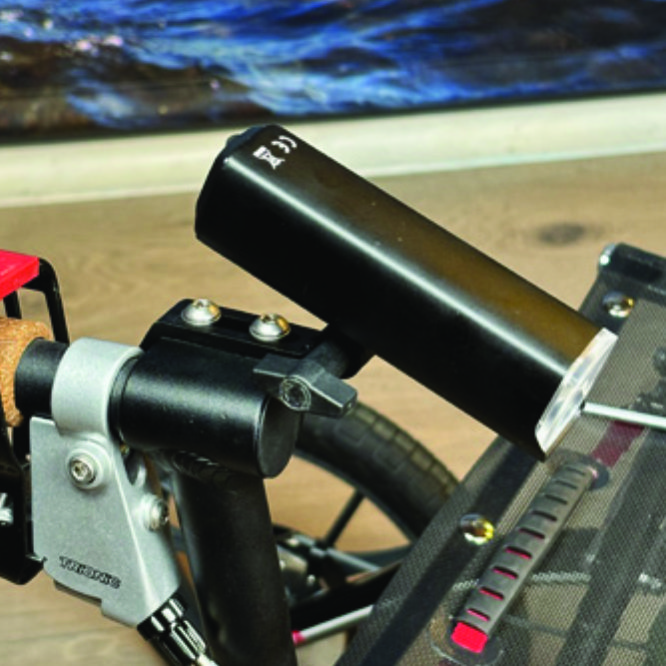
Identify the circular front end of the light holder, with two slots for attaching the light.
A6. Identify the circular front end of the light holder, with two slots for attaching the light.
Push the slotted bracket of the light into the slots of the holder and make sure they are aligned. Seen in the traveling direction of the Walker, enter the included wingnut from the left and tighten it.
A7. Push the slotted bracket of the light into the slots of the holder and make sure they are aligned. Seen in the traveling direction of the Walker, enter the included wingnut from the left and tighten it.

Instructions for a Veloped

Locate the screw at the center folding hinge of the U-shaped grip bar of the Veloped. Unscrew the screw with the included 4mm allen key and remove it.
B6. Locate the screw at the center folding hinge of the U-shaped grip bar of the Veloped. Unscrew the screw with the included 4mm allen key and remove it.
Identify the circular front end of the light holder, with two slots for attaching the light.
B7. Identify the circular front end of the light holder, with two slots for attaching the light.

Instructions for Use

Overview

Caution

Caution

Battery Performance

Battery performance is significantly affected by temperature variations: •Low Temperature: At 0°C, capacity decreases by 5–10%, reducing operation time by 50%. At -20°C, capacity drops by 30%, potentially shortening operation time by 70%. Performance returns to normal when the temperature rises to 20°C. •Self-Discharge Rate: At room temperature, the battery loses about 1% of its capacity per day. When stored at 40°C, the self-discharge rate increases, leading to a loss of approximately 5% of capacity per day. To maintain optimal battery performance, avoid exposing it to extreme temperatures and store it in a cool, dry place. If you do not use the battery for a long time be sure to recharge the battery every 3 months.

Safe Mode

When the battery is low, the light will automatically switch to a 50-lumen high-beam safe mode, providing an additional 30 minutes of operation.

How to operate the light

Press and hold the switch for 2 seconds to turn the light on or off. Click once to cycle through modes, and double-click to enable ultra-bright mode (1000 lm).

The package contains

Charging And Powerbank

Customer Reviews

Dorothea Michel
Finally, some light!
The lamp is great, very bright, and the adjustability is fantastic. It's definitely worth the money.

General FAQ

Relevant Guides

Search help

Also Purchased Products

Product Reviews    

  • For any age, this is the Walker to choose.…

    I am delighted with my 12er. Try to use it everyday. I am 88 and In a walking for Health Group. So many other walkers have asked all about it.( Men taking notice of the Soldering, Brakes and Tyres ) Ive done quite a bit of " Off roading" it went well…

  • Yes, there are many people I've gotten to know just because we roll arou…

    With a neurological injury that causes shaky legs, I bought a Trionic Sport a few years ago.
    With it, I take my dog ​​out for two hours every day. The walker is stable and safe.
    Perhaps it is most effective in the winter. With good shoes, I can get…

  • Major benefits over rough ground…

    My Veloped Sport has had major benefits above & beyond my old standard rollator. Walking out in woods with the dogs no need to steer around rough areas, just push & go.
    Walking over my horse's field is easier, doesn't get stuck in rough ground & Chr…

  • S U P E R !…

    The shipping and the delivery of our Veloped Trek M 14er was completed in 3 days!
    So, it was very fast!

    Our Veloped was carefully packed and, when we unpacked it, was not damaged! We did not have any problems with the assembly either! See video a…

  • I am very happy with the Veloped Tour…

    I now enjoy walking again. I walk more safely and don't put as much strain on my joints as with the walking poles. I also cope better with the uneven paths. It's also ideal for shopping.…

  • Fern howe…

    I am really delighted with my new walker it has completely met and gone above my expectations. I went on a walk last weekend which was very rough and uphill, normally I have a daughter on each arm and still find it very difficult but with my lovely…

  • Great piece,…

    It's great to handle, but I should have measured the boot of my car beforehand, well, folding down the rear seats works too. Have I been travelling a lot? Unfortunately not, family matters on the one hand, staying in hospital on the other, etc. Next …

  • Not wanting to use a traditional walker…

    I'm a 73-year-old male. I have a long history of back problems. Until my most recent injury, I enjoyed long daily walks. I found that when using a grocery cart while shopping the support it gave me significantly reduced my discomfort.

    Not wanting …

  • Walker 12er (size M/L)…

    The Walker 12er (size M/L) is the best I've seen. I'm very satisfied. High-quality workmanship and easy to handle in practice. I can only recommend this rollator.…

Subscribe to our newsletter!